Learning Revit is a handful. Trust me, I know. I spent the better half of my summer vacation modeling a single project. During the course of learning Revit, unfortunately, I have had the deep urge to punch a hole in my laptop screen more times than I can count because things just weren’t making sense. To that end, I think I can dish out some tips for absolute beginners starting Revit. These tips ought to save you some hair as you won’t be pulling them out from frustration as much after reading the tips.
A caveat before we begin: These tips are only for absolute beginners. If you are anything but, close this tab. Just don’t complain at the end of the blog that reading it wasn’t worth it.
5 Revit tips for beginners
1. Revit projects vs. Revit families
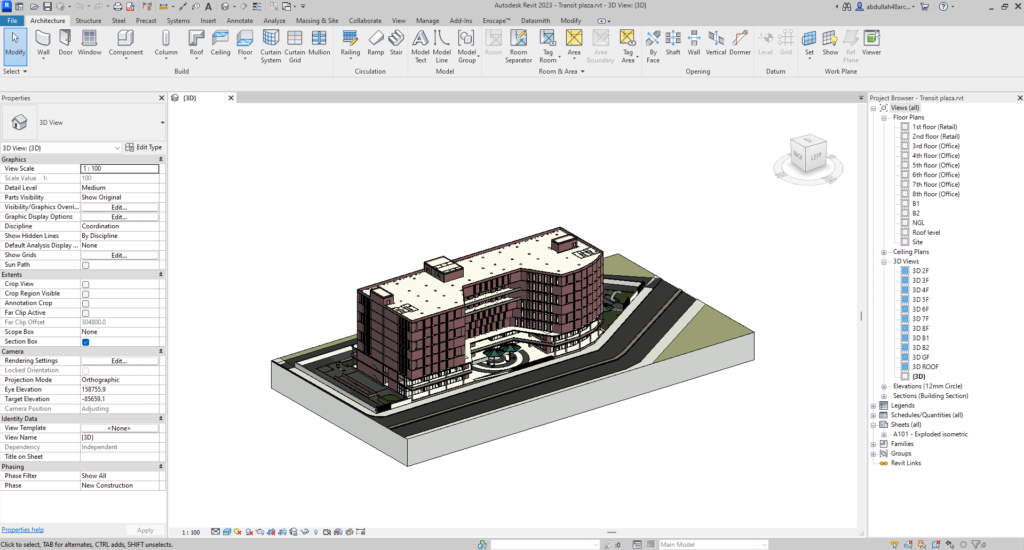
This is the first thing that will hit you when you open Revit. You have the option of opening a new Project or a new Family. The difference is simple. A project is a file where the entire model of the building (or whatever you are modeling) is. A family on the other hand is a single component within that building/project.
Each category has many different types of families. Now, what is a category? A category is an element that is intuitive to buildings. For example, walls, windows, doors, roofs, ceilings, so on and so forth. For each category, Revit already has some families built into it.
For instance, the Window tool already has some types of windows like casement windows or sash windows built in. But most of the time, your design will demand a different type of window than what is already available. In that case, you will have to model it as a family.

2. Draft drawings in CAD before Revit
Revit certainly seems shiny to innocent people approaching it at first. But then the teeth come out when they realize the dizzying functionalities embedded in the software. It is best that you navigate Revit step-by-step. As you get a grip on it, you can explore further. To that end, it makes sense that a 2D drawing from any CAD software (like AutoCAD), would make modeling easier. Especially so when you are doing it for a school project.
To place CAD drawings in Revit, you can two options. You can either import the drawings via the Import CAD tool in the Insert tab, or you can link the CAD file using the Link CAD tool in the Insert tab. The second option offers the benefit of live updates. That means if you make a change in the CAD file and save it, that change will automatically be updated in the Revit model. This is a super-useful tool when you are still in the design process.

3. Familiarize yourself with the basic tools
Revit has a bunch of super-advanced functionalities. You can set up a geothermal heat pump with a variable flow indoor unit as part of the HVAC system and calculate its cost, efficiency, and life cycle to boast. But for us architecture students, the most useful tools are the basic ones. And you will be surprised how much you can do with them.
Wall, Door, Window, Floor, Roof, Column, Stair, and Ramp. Those are all the tools I needed to create 95% of my 3rd year final design. That is because there are so many ways in which they can be manipulated. A wall can have any thickness, have an opening in it, curved, slanting, sloped, or tapering. It can drawn using a line from a drawing, or a rectangle, arc or polygon. It can host windows, doors, sunshades, etc. Yet the Wall tool is extremely easy to use.
So if you master these simple tools, Revit will be a lot easier. I suggest the YouTube channel Balkan Architect. Watch all the videos you can find on these tools and you will be good to go.

4. Pay attention to the visibility/graphics overrides
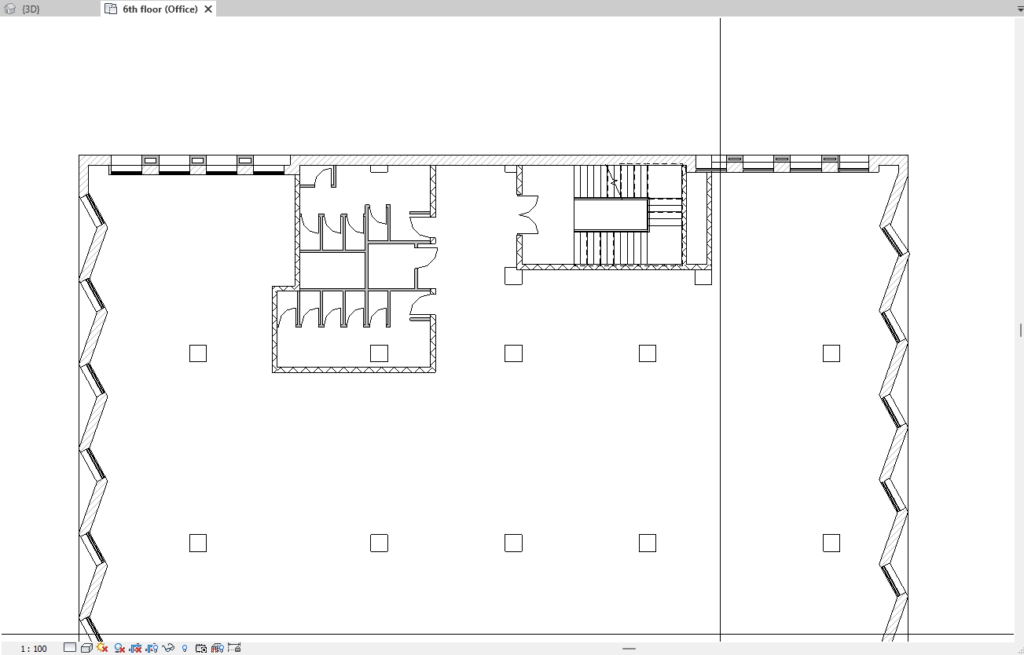
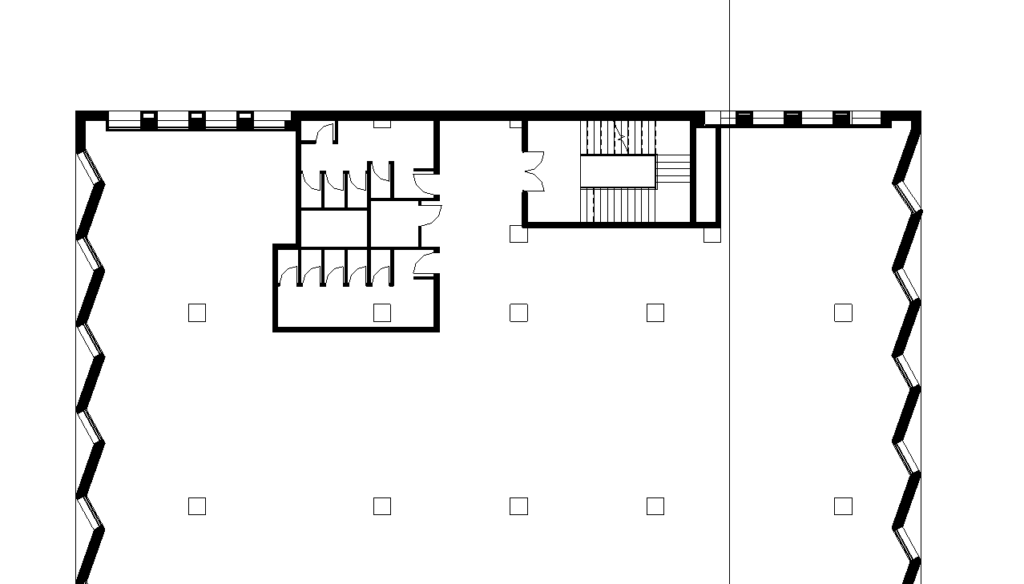
Revit is not known for producing the most elegant drawings. Usually, the drawings you export from this BIM software will have to go through the grind of some visual effects software, like Photoshop, to look presentable. That said, the output in Revit can be improved a lot by tweaking the Visibility/Graphic Overrides (VG) for any particular view (drawing).
For example, most built-in walls in Revit have multiple layers of insulation, building units, etc. But for an architectural drawing, which is representative in nature, all these details may not be necessary. In that case, you can use the Visibility/Graphics tool by going to the View tab or hitting VG on the keyboard. Here, you will see all the categories currently present in Revit. For a beginner, most of these don’t matter. Just navigate to the proper category and vary the settings until you get graphics to your liking.
For instance, if a wall in a plan has too many details and all you want is a black block out like I do, hit the keys VG, navigate to the Walls and click on it. The entire row will show the button Override. Change the settings according to your preference. I use Solid as the pattern and black as the fill color for the Cut graphics.

5. Rendering in Revit: some thoughts
I realize rendering is not something an absolute beginner in Revit would need to know about. However, sooner or later, every Revit learner has a brush with it and I thought I’d share some thoughts from my experience.
Revit has inbuilt rendering tools. Most avoid them and go for some third-party software or plugin because of the bad rap it has. Apparently, this BIM software does not produce great quality renders. But I have tried it and in my opinion, if you are not looking for hyper-realistic renders, Revit does the job. And it is pretty simple too. All you have to do is set up a view, set up a few rendering settings and hit the button.
Realism and personalization is where Revit falls short of the mark and that is where the jam-packed market of rendering softwares comes in. Here are my top picks. If you are looking for a plugin, Enscape is great. It also offers a 14-day free trial. If you are looking for a separate software, Lumion and Twinmotion are good choices, though both are heavy on the system requirements. Lumion needs a paid subscription but Twinmotion is free if you earn under a million dollars in gross revenue annually, which you probably do, since you are reading this.



And there you go! Those are all the tips I have for absolute noobs in Revit. My last tip would be to take it easy and stick with it. Sometimes you might get frustrated but it’s not that difficult. Anyway, hope you enjoyed the blog and gained some value from it.
Catch ya’ later!


